Blog » Urgent FreeBSD Installation on Asus A6R Laptop
Urgent FreeBSD Installation on Asus A6R Laptop
Intro
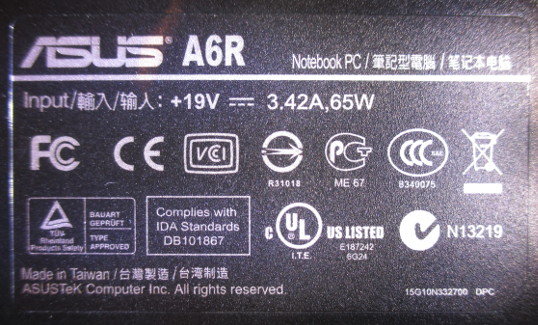
My Lenovo Edge 430 broke down almost at the end of configuring a Linux server for a customer. I had a backup laptop a friend of mine gave me two years ago: Asus A6R. I decided to install FreeBSD on it for running ssh, so I could finish Linux server configuration.
Why FreeBSD? I didn't know. Just had been missing it for several years.
By the way, Olya Churkina, thanks for the laptop. It really helps.
Installation
I just burned a DVD using FreeBSD 10.2 ISO-file from the official site, and performed a default installation. The only customisations I made on this stage were creation of a user named "user", and installing the Handbook.
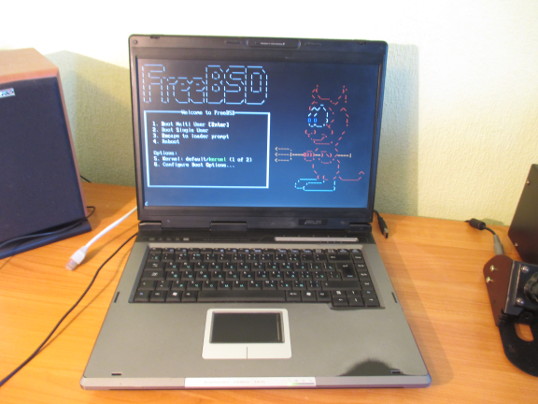
Oh, and for this nicely looking beastie I've added to my /boot/loader.conf:
loader_logo="beastie"
Console
At first, let's use the new virtual console driver instead of syscons by changing /boot/loader.conf:
kern.vty=vt
Also, it's handy to load Kernel Mode-Setting video drivers from /etc/rc.conf for having video-mode set according to the possible screen resolution:
kld_load="%YOUR_MODULES% radeonkms"
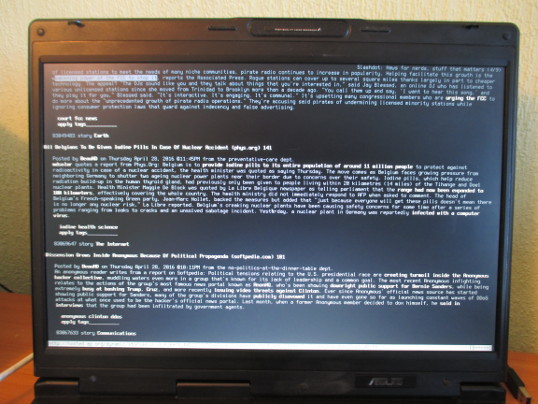
After rebooting we'll have sexy virtual terminals able to show more information on the screen than by default.
Wireless Network
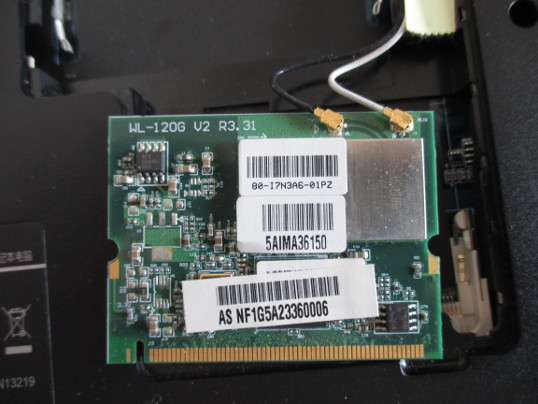
Our Broadcom chip is supported by if_bwn driver, but it requires installing firmwares from /usr/ports/net/bwn-firmware-kmod. So, let's go to the directory of the port, and type `make install` (or use any other way of installing you prefer). A file we need will be installed as /boot/kernel/bwn_v4_ucode.kld
Now we need to activate the wifi drivers in /etc/rc.conf:
kld_list="%YOUR_MODULES% if_bwn bwn_v4_ucode"
After a reboot we must see the two modules in the output of `kldstat`.
Also bwn0 network interface must be present in the output of `ifconfig`:
bwn0: flags=8843 metric 0 mtu 2290
	ether CA:FE:BA:BE:F0:0D
	nd6 options=29
	media: IEEE 802.11 Wireless Ethernet autoselect mode 11g
	status: no carrier
Next we need to create a wlan interface on top of bwn0. We are going to use WPA2, this is why before creating wlan0 we must load a module that allows programs providing wlan authentication mechanisms to work:
kldload wlan_xauth
Then create wlan0 on top of bwn0:
ifconfig wlan create wlandev bwn0 authmode wpa mode 11g country UA
Now network discovery must work:
ifconfig wlan0 scan
Put your network name and password into /etc/wpa_supplicant.conf (you'll be prompted for the password):
wpa_passphrase YOUR_WIFI_NET_ID >> /etc/wpa_supplicant.conf
Run wpa_supplicant:
wpa_supplicant -c /etc/wpa_supplicant.conf -i wlan0
...and behold continuous connects/disconnects.
As I understand, this is because the wifi-drivers are not "ACPI-ready". We need a working OS as soon as possible, so let's just turn off the ACPI driver by writing this into /boot/device.hints:
hint.acpi.0.disabled="1"
And let's preserve our wireless configuration using /etc/rc.conf:
kld_list="%YOUR_MODULES% if_bwn bwn_v4_ucode wlan_xauth"
wlans_bwn0="wlan0"
ifconfig_wlan0="WPA SYNCDHCP mode 11g country UA"
After a reboot we must see something like this in ifconfig's output:
bwn0: flags=8843 metric 0 mtu 2290
	ether CA:FE:BA:BE:F0:0D
	nd6 options=29
	media: IEEE 802.11 Wireless Ethernet autoselect mode 11g
	status: associated
wlan0: flags=8843 metric 0 mtu 1500
	ether CA:FE:BA:BE:F0:0D
	inet 192.168.0.4 netmask 0xfffffff8 broadcast 192.168.0.7
	nd6 options=29
	media: IEEE 802.11 Wireless Ethernet OFDM/54Mbps mode 11g
	status: associated
	ssid YOUR_WIFI_NET_ID channel 5 (2432 MHz 11g) bssid BE:EF:F0:0D:CA:FE
	regdomain NONE country UA authmode WPA2/802.11i privacy ON
	deftxkey UNDEF TKIP 2:128-bit txpower 30 bmiss 7 scanvalid 60 bgscan
	bgscanintvl 300 bgscanidle 250 roam:rssi 7 roam:rate 5 protmode CTS
	wme roaming MANUAL
On the first console we often get messages from bwn0 about decoding attempts. They can be safely ignored for now.
NTFS Mounting
It's rather optional for some people, but I use NTFS on my flash-drive.
Install ntfs-3g from the ports (`pkg install fusefs-ntfs`), and add this line to boot/loader.conf:
fuse_load="YES"
Now it's possible to mount NT File System using this command:
ntfs-3g /dev/da0s1 /mnt
User Configuration
As we must not work as root, let's provide our user with better experience.
For being able to run su as a user:
pw group mod wheel -m user
For shutting down the laptop:
pw group mod operator -m user
For localization, add a new user class to /etc/login.conf (see which locales available using `locale -a`):
ukrainian|Ukrainian Users Accounts:\
	:charset=UTF-8:\
	:lang=uk_UA.UTF-8:\
	:tc=default:
After /etc/login.conf editting we need to rebuild the binary representation of it:
cap_mkdb /etc/login.conf
Now, let's assign the new class "ukrainian" to our user:
pw usermod user -L ukrainianRelogin as the user, and make sure commands like `date` and `ncal -y` print months and week days in your language (in non-X console, with the settings we've made, Unicode will be displayed properly only if you use the new virtual terminal driver).
Here we can stop, because now we have everything for getting the work of configuring the remote Linux server done. However, after a day of working in console mode I realized the need of something more sophisticated than elinks for Internet surfing. So, the next optional section is about running the X-server on Asus A6R.
X-Server
Of course, we need xorg server:
pkg install xorg
If you're still using syscons, you'll have problems after running X server: all consoles will be blank when you switch to them (even after finishing working with X). So, now it's really time to put this into your /boot/loader.conf:
kern.vty=vt
Concerning a window manager, I'm going to use shipped by default twm with my already ready configuration file downloadable from here. Just unpack the archive into your home directory, and write this in ~/.xinitrc:
xsetroot -solid black
exec twm
After `startx` you're ready to go with a menu shown on left click. Edit this menu in .twmrc according to your needs.
Also, if additional keyboard layout is required, put this into ~/.xinitrc as the first line (switch layouts with Alt+Shift):
setxkbmap -layout us,ua -option grp:alt_shift_toggle,grp_led:scroll
After installing Firefox from the ports, D-Bus must me enabled in "/etc/rc.conf":
dbus_enable="YES"
For making copying between an xterm and other programs work properly (e.g. for selecting text in xterm and pasting it with a middle mouse click in Firefox), Unicode locale must be configured.
If you don't want to start xorg manually every time, it's possible to install X Display Manager:
pkg install xdm
Turn it on in /etc/ttys:
ttyv8 "/usr/local/bin/xdm -nodaemon" xterm on secureAnd use .xinitrc we just create as .xsession:
ln -s ~user/.xinitrc ~user/.xsession
After rebooting you'll see the XDM login screen.
Sound
If we already have an X server, it's logical to configure sound on our FreeBSD system, but it also can be configured independently.
Just write this in your boot/loader.conf and reboot:
snd_atiixp_load="YES"
Conclusion
We've definitely configured FreeBSD on Asus A6R laptop (1.6 GHz Celeron M, 384 MB RAM): now it's possible to surf the Web (1-2 tabs in Firefox without swapping, 144p-quality video on Youtube), read email, use different network tools (ssh, ftp, netcat), listen to music, and write this article in Emacs. However, some problems left:
-
After switching to the new virtual console driver we start getting this message in `dmesg`:
module_register_init: MOD_LOAD (vesa, 0xc0fbe2b0, 0) error 19
This is probably because VESA is compiled into the generic kernel. I tried disabling VESA through /boot/loader.conf, but it didn't help eliminate this issue.
-
It looks like Radeon KMS drivers aren't fully functional. There are these lines in `dmesg`:
error: [drm:pid127:r100_ring_test] *ERROR* radeon: ring test failed (scratch(0x15E4)=0xCAFEDEAD)
error: [drm:pid127:r100_cp_init] *ERROR* radeon: cp isn't working (-22).
drmn0: error: failed initializing CP (-22).
drmn0: error: Disabling GPU acceleration
error: [drm:pid127:r100_cp_fini] *ERROR* Wait for CP idle timeout, shutting down CP.
error: [drm:pid127:r100_cp_disable] *ERROR* Failed to wait GUI idle while programming pipes. Bad things might happen.
As you see, because of this 3D acceleration doesn't work (e.g. Tux Racer is playable, but it doesn't work very smoothly).
-
We've turned off ACPI, which is maybe fine for an connected to the mains laptop without a battery, but definitely not a good idea for a laptop playing its natural role of a portable device.
Nevertheless, if I had found an article like this before configuring the laptop, it would have saved my time. I hope it has saved a bit of your time. Also, if you know how to deal with the issues left, please comment this blog below.
Comments (frozen for the time being)
No one has commented on this page yet.